How to Plant Amaryllis Bulbs Indoors : 5 Easy Steps
Some of the links in this post may be affiliate links.
Do you want to know how to plant Amaryllis bulbs indoors? Luckily, it is super easy to do and in this post, I will describe step by step, with photos, how to plant your bulb.
I've been growing these plants for many years, and I can't think of any other plant that easily grows indoors that has showier flowers than Amaryllis.
The flowers come in a range of beautiful colors, shapes and patterns, so keep reading to learn how you can easily plant your bulb and nurture it into a prized specimen.
Would you like to save this post?
Not to be confused with Amaryllis belladonna (I know it's confusing...), the plant in this post actually belongs to the Hippeastrum genus, but are commonly called Amaryllis.
Hippeastrum species are native to parts of Central America and much of South America, and there are currently about 107 accepted species within this genus.
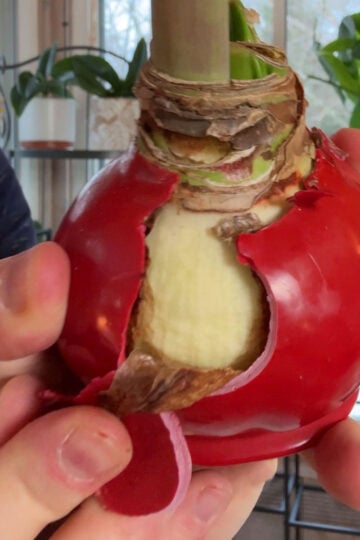
Note that this post does not address waxed amaryllis bulbs that are not meant to plant in soil. Those are meant to be disposed of after they bloom. For a plant that you can keep for years to come, do not purchase a waxed amaryllis bulb. But if you were gifted a waxed bulb, or can't find an unwaxed one, check out my post on saving a waxed amaryllis bulb. I'll show you how to remove the wax and plant it successfully.
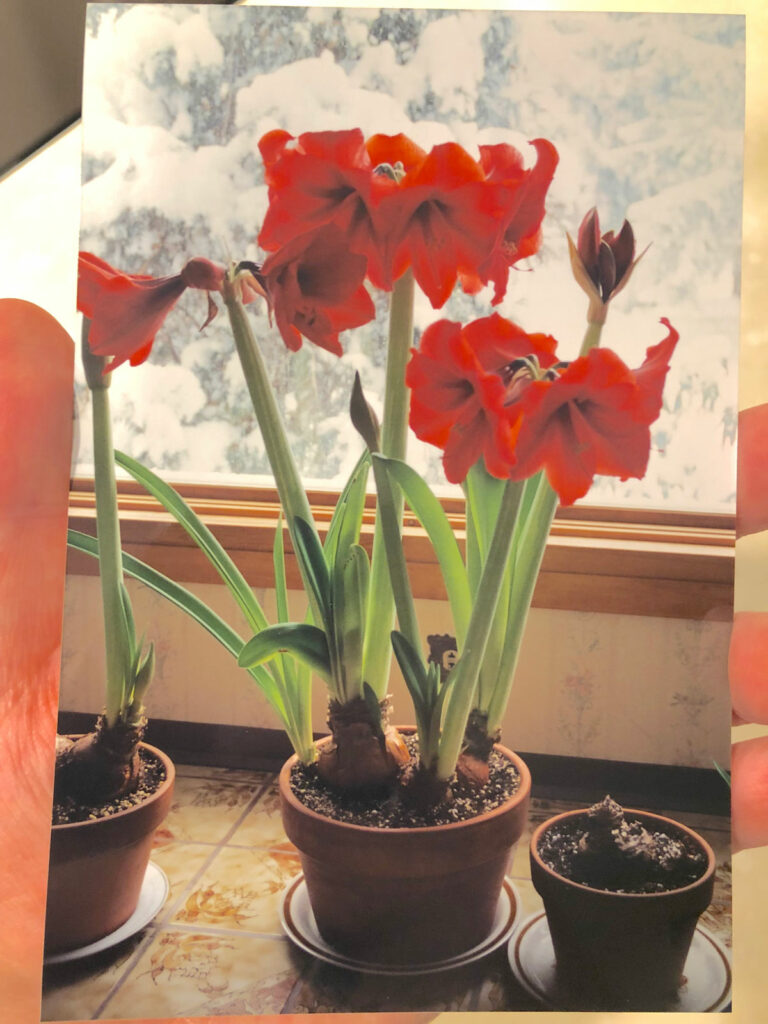
Table of Contents
HOW TO PLANT AMARYLLIS BULBS INDOORS
1. Purchase the biggest bulb you can
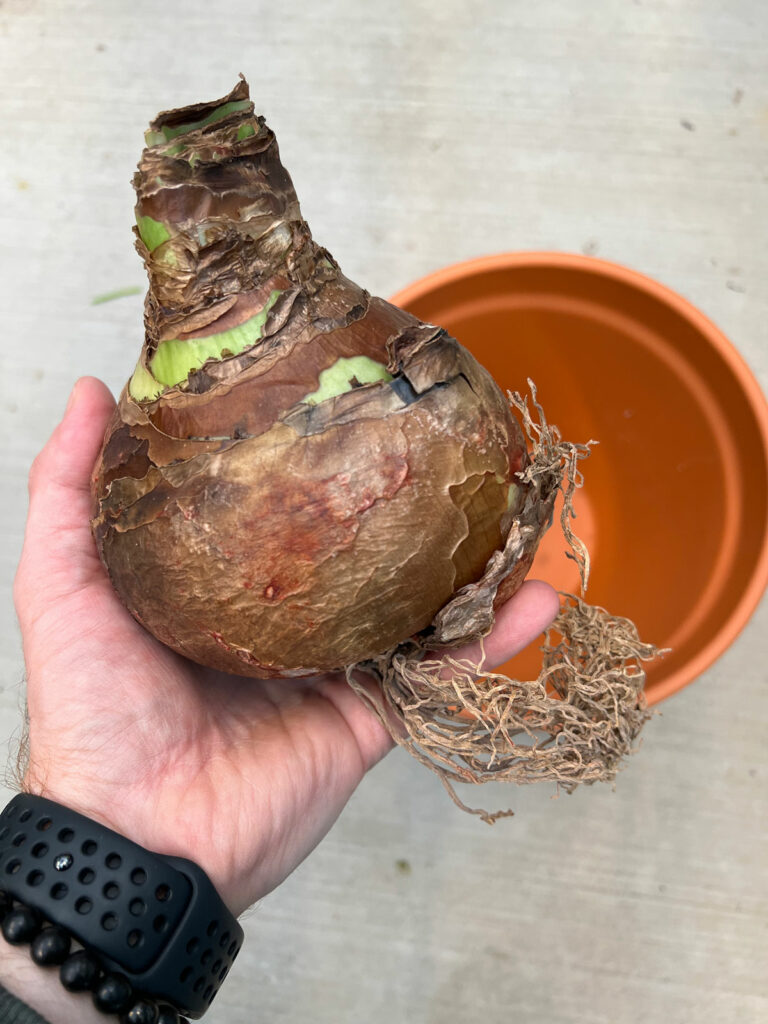
Purchase the biggest bulb that you can afford. Choosing small bulbs will result in plants that are less vigorous and with less blooms.
You will pay a little extra for a jumbo sized bulb, but it will be worth it down the line! Amaryllis bulbs are typically sold in garden centers and stores in mid to late Autumn, or you can purchase them online from a number of different growers.
When selecting a bulb, choose one that is firm to the touch.
Avoid buying kits that come with the bulb in a box. This will not allow you to inspect the bulb, and they are usual small and of inferior quality.
If you've purchased a bulb and you can't plant it immediately, store it in a cool location between 40°-50°F (approx. 5-10°C).
2. Select an appropriate pot
There are two important considerations when choosing a good pot for your Amaryllis bulb:
POT SIZE
Amaryllis plants don't like their roots disturbed, and they do like to have their roots pretty constrained for the best display while blooming.
Here is how I choose the right pot size for Amaryllis bulbs:
- Hold the bulb over near the very top of pot that you are potentially going to use.
- Place the bulb right in the middle, and you'll want there to be about 2 inches or so from the widest point of your bulb to the edge of the top of the pot.
POT TYPE
There are many pros and cons to different pot types, but you'll want to choose a heavier pot and avoid lightweight plastic pots.
The reason is because your plant will become quite top heavy when it blooms and as it subsequently grows a lot of foliage.
My preferred pot type for amaryllis is terra cotta pots, but you can also use a glazed ceramic pot or a similar, sturdy, heavy pot.
Whatever pot you choose should have a drainage hole. This is not optional!
3. Blend your potting mix
Amaryllis plants need a freely draining potting mix, so be sure to incorporate some coarse materials into your potting mix to improve drainage.
A good rule of thumb would be to use 2 or 3 parts of your favorite all-purpose potting mix, along with 1 part of either perlite or ¼"
There are some pros and cons to using perlite vs pumice, so choose what you're comfortable with. You can even incorporate LECA balls if you have then on hand.
4. Plant the bulb
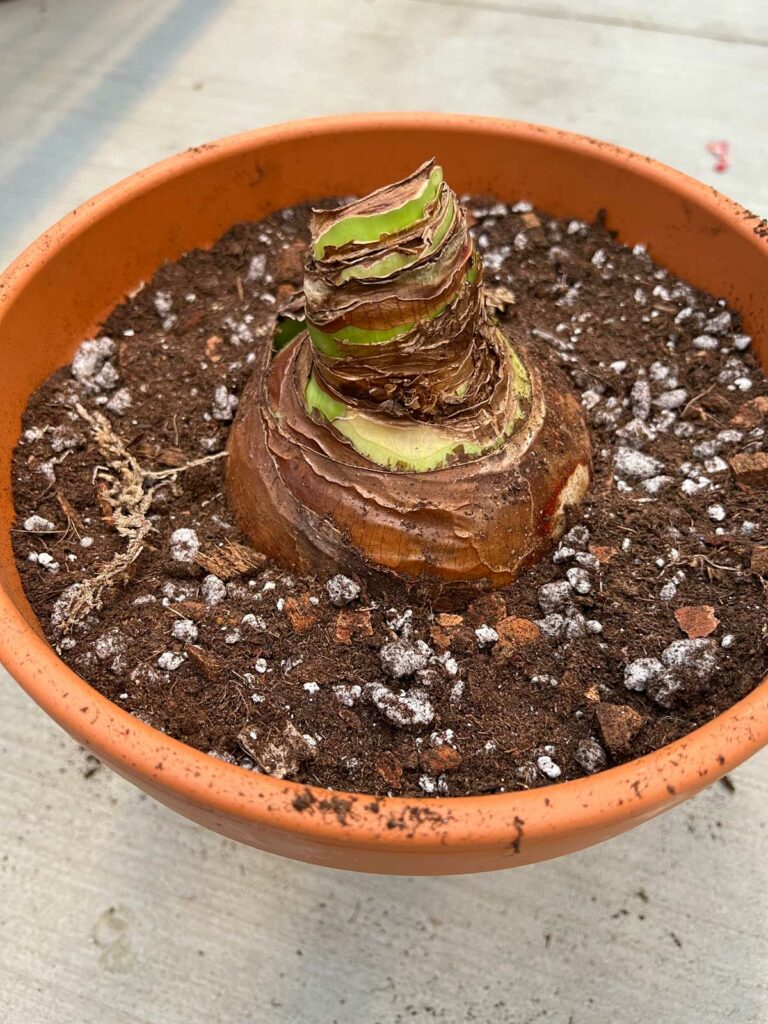
First, place some soil at the bottom of pot and you'll have a little trial and error to get the right amount of soil in the pot, as well as the correct placement of your bulb.
You'll ultimately want to leave about an inch from the final soil level to the top of the pot. This allows a water reservoir for when you water, and will contain the soil and not make a mess when you water.
At the same time, you'll want to leave the top ⅓ to ½ of the bulb exposed. Don't bury the entire bulb under the potting mix.
The "neck" and "shoulder" of the bulb should be above the soil line. Gently firm the soil down with your hands.
5. Water and place in sunny location
Lastly, give your pot a good watering, allow excess water to drain away, and place your plant in a warm, sunny window, the sunniest window that you have.
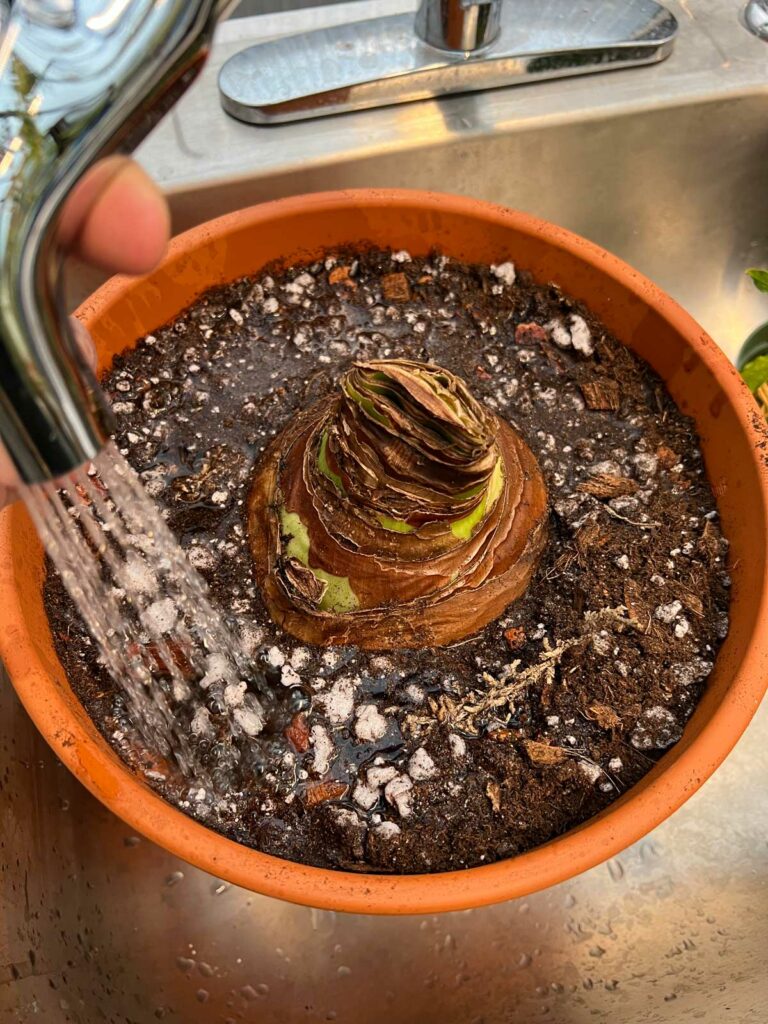
You'll want to be careful with watering until you start to see growth coming out of the top of the bulb. Until you start to see growth, allow the top 3-4 inches to dry out before watering again.
Once your plant starts actively growing, you can allow only the top inch of the potting mix to dry out.
Amaryllis are sun loving plants, so place immediately in front of your sunniest window. Your plant will typically first throw out flower stalks and then leaf growth begins. Sometimes, both will appear at the same time.
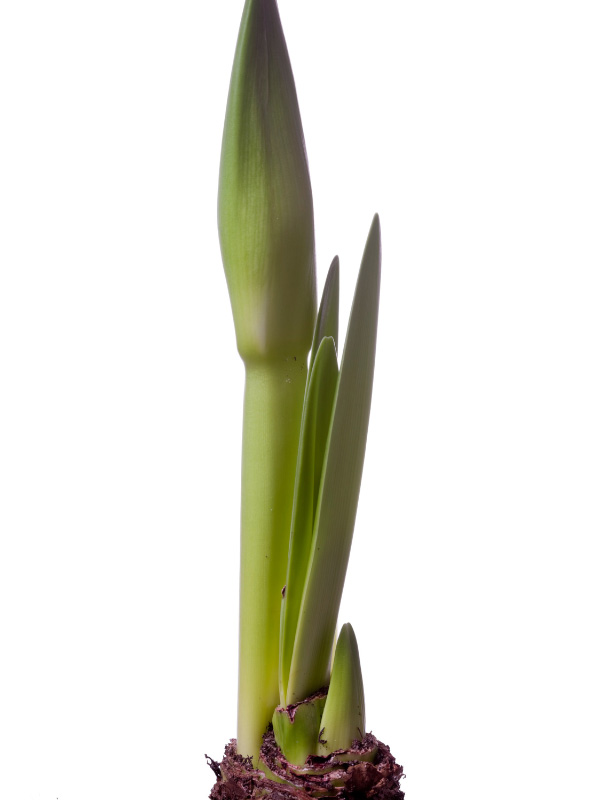
If you don't have enough light for your plant, the leaves will become weak, flimsy, and will flop over easily.
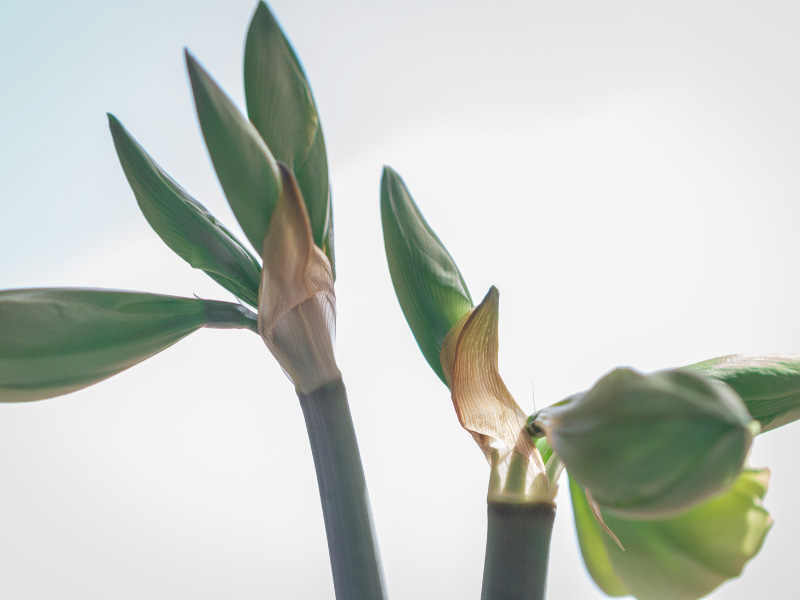
Each bulb should grow at least one flower stalk, but many times they will even grow two (especially if you start off with a big bulb)! Each stalk typically produces 4-6 huge flowers.
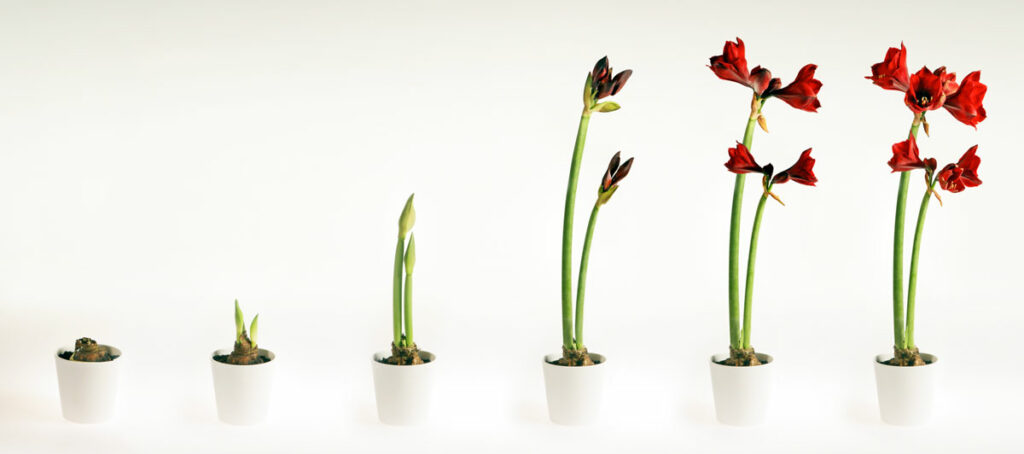
Be sure to rotate the plant frequently as it grows. The flower stalk will bend towards the window pretty quickly, so as you notice your flower stalk reaching to the window, turn it 180 degrees so it straightens out.
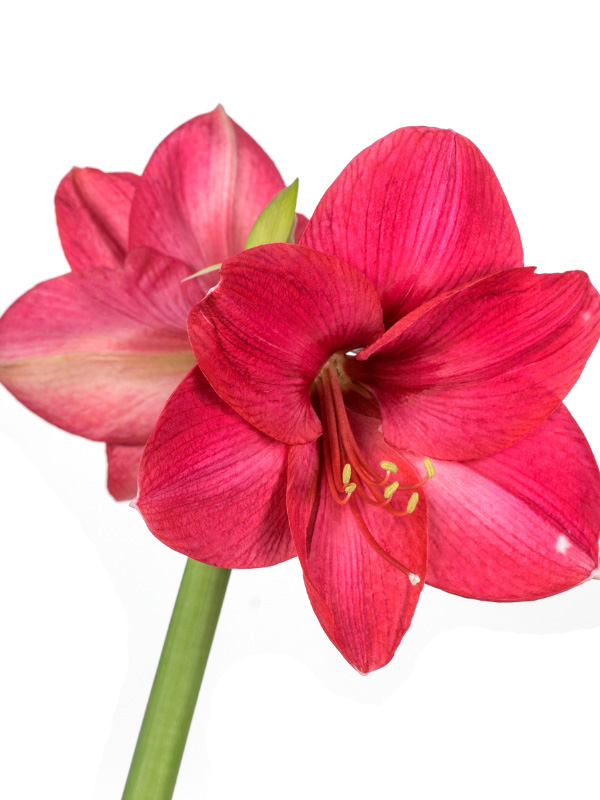
When your flower buds start to open, you may want to position your plant so there is no direct sun shining on the actual flowers. This will prolong the life of the flowers.
As the flowers fade, cut each one off. Once all the flowers on each stalk are spent, take a sharp knife and cut off the entire flower stalk at the base of the plant.
DO NOT CUT ANY LEAVES OFF after your plant is done blooming! You'll need to allow your leaves to grow for several months before inducing a dormancy period.
If you plan on keeping your amaryllis year over year, please be sure to read my post on what to do with amaryllis after blooming. In this post, I describe everything you need to do to ensure your plant thrives for years to come and explodes with flowers every year.
I once kept a plant for a dozen years before I moved and left the plant with someone!
FREQUENTLY ASKED QUESTIONS ABOUT AMARYLLIS
SHOULD I SOAK MY AMARYLLIS BULB BEFORE PLANTING?
It is not absolutely necessary, but if your bulb and roots seem really dehydrated when you purchase it, you can soak the roots and the base of the bulb in a bowl of warm water for a few hours before planting it.
WHEN SHOULD I START MY AMARYLLIS BULBS INDOORS?
Bulbs are typically sold in mid to late Autumn. If you'd like your plant to bloom around Christmas time, plant the bulb about 6-12 weeks before you want it to bloom. The timing varies depending on your growing conditions (light, temperature, etc.), so make a note of when you planted it and how long it takes to bloom so you can plan accordingly for the following year. If you want to speed up the rate at which your plant blooms, supplying bottom heat will cause it to grow more quickly. You can either place it on a propagation mat or simply on top of a radiator (as long as your plant is still in a sunny location).
DO INDOOR AMARYLLIS COME BACK EVERY YEAR?
Yes they do! These plants can be kept indefinitely with proper care. Refer to my blog post on what to do with Amaryllis after blooming for more details.
HOW MANY FLOWER STALKS DO AMARYLLIS HAVE?
Typically, they will grow 1 stalk, or even 2, per bulb. Sometimes even 3! This all depends on how well cared for your plant is. Each flower stalk typically will have 4 flowers, but even up to 5 or 6.
WHEN SHOULD YOU CUT THE STALK OF AN AMARYLLIS?
After all the flowers on an individual stalk are withered, you can cut the entire flower stalk off. Simply take a sharp, sterilized knife and cut it right off at the base of the bulb. Do NOT cut any leaves off.
HOW DO YOU KEEP AMARYLLIS FROM GETTING LEGGY?
If your plant has weak, floppy leaves, it is due to insufficient light. Amaryllis plants are sun lovers so make sure to place your plant immediately in front of the sunniest window that you have indoors.
WHAT IS THE BEST FERTILIZER FOR AMARYLLIS?
Using a fertilizer with lower nitrogen, and one specifically made for bulbs, is a smart idea. These bulb fertilizers will feed your plant slowly over time and will nurture the health of your bulb and plant.
WHAT DO I DO IF MY AMARYLLIS DOESN'T BLOOM?
This is most likely due to your plant not having enough direct sun. These plants need a lot of direct sun in order to thrive, and they must be consistently fertilized with a good bulb food. If you've cut the leaves off immediately after blooming, this likely impaired your plant from blooming that year. Foliage must be allowed to grow and ripen for several months before a dormant period.
I hope you've enjoyed this post on how to plant Amaryllis bulbs indoors. Do you have an Amaryllis? Comment below. I'd love to hear!




I have six amaryllis planted in pots with no drainage holes, and I’ve had them this way for seven years. I’ve not lost one. They bloom beautifully yearly, and I’m careful not to overwater. It is possible to use pots with no drainage holes - just water less often. Thanks for your very informative blogs & videos. They are so helpful & so appreciated!
Thanks for sharing your experience Helen. It can certainly work, but like you mentioned, you just have to be careful with watering. I still prefer having a drainage hole though, and it also helps with flushing out any accumulated fertilizer salts, etc. But there are many ways to grow plants, and if it's working for you, keep doing it 🙂
At 69, it's my first try. Thanks for all the great info on my new AMARYLLIS BULB
I have about 10 amaryllis bulbs planted in my front yard which faces East but we also have the sunny South area. A friend gave them to us about 10 yrs ago. Most of them bloom and a couple need to be separated. As I live in South Alabama, Mobile, we usually don’t get but a couple of really cold snaps a year. This year we had about 5 inches of snow which was a 100 year record. My amaryllis stay in the yard year round. Now I want to put some in a pot to bring in the house. I never found where to download and print. I went to the end of the article then to the end of the comments and never found that info. Fortunately the article came in my email so I can keep it. Tomorrow I will ask my sons to help me find and download it. The friends who gave the amaryllis to us have them on the Sourh side right up next to their brick house. Every year they are beautiful and they shared with us. Maybe I need to move them right next to my South side. Is it ok to move them to a different location kn the yard and if so, when? Your article was wonderful. I want to keep up with more of your articles. Thank you so much.
You're very welcome Peggy! It may be a good idea to move them to the south side of your house, since you already know it is working in your area. And this may also create a slightly warmer microclimate by having it against the house so it would definitely be beneficial. I'm glad you enjoy the article! As far as moving, I would do it in the Fall to early winter.
My two bulbs continued to grow beautiful green leaves during the summer. I cut them off and pulled the bulbs out of the soil for a dormant period. There are a lot of healthy looking roots. Should I trim those back for the dormant period?
Hi Carole. I would always recommend to stop watering the plant and let the leaves fully yellow before you cut them off. I would leave the roots as is and not do anything with them. If you need to repot into a bigger pot, you can do it when you take your plant out of dormancy and start watering again which is when you should have flowering occurring.
A friend gave me a planted bulb that has bloomed twice in the past 6-9 months - first with one bloom, then with two. It now has several "babies" in the soil. Do I leave them or plant on their own?
Hi Jen! Sounds like a happy plant! In the past, I had one for a dozen years and I left all the babies. It formed a stunning specimen with multiple bulbs and a huge amount of blooms. You can definitely leave it if you want a specimen. You can also separate the babies too. It's just personal preference 🙂
After the flower dies there is a "pod" at the top of the starlk, should that be removed at the same time as the dead flowers?
That's actually a seed pod. And yes, you should cut the entire flower stalk off at the base. Just be careful not to cut off any leaves that are emerging from the bulbs 🙂
I bought those waxed amaryllis. At 3 for $20 at Costco, the deal was too much to resist. I can’t decide if the person who thought of this was a genius or if they’ve created a horticultural abomination. Either way, these waxed amaryllis can be grown on the next year. You just have to peel the wax off and plant it. Where did you get that giant bulb? I’d love to get a variety you can’t buy at a big box store.
Hi Sheila! There is nothing wrong with the waxed amaryllis and many people just treat them as cut flowers which is fine! And that sounds like an amazing deal for 3 of them! As far as the giant bulb I showed in this post, I got it at a local garden center near me in Ohio. You can also just search online for "jumbo amaryllis bulbs" and there are plenty of places you can order from to mail order a bulb. There are so many gorgeous varieties!
Can I use a gro lite rather than sunlight? For how many hours ?