Some of the links in this post may be affiliate links.
When I first starting growing moth orchids, or Phalaenopsis, I got excited over every little new growth that would show up at the base of the plant. I kept thinking that a new orchid flower spike was growing, when in fact most of the time they were just roots! So I kept looking…and looking…and waiting…until I finally saw something that looked a little different. Different enough to know that it wasn’t yet another root. It was finally a new flower spike growing!
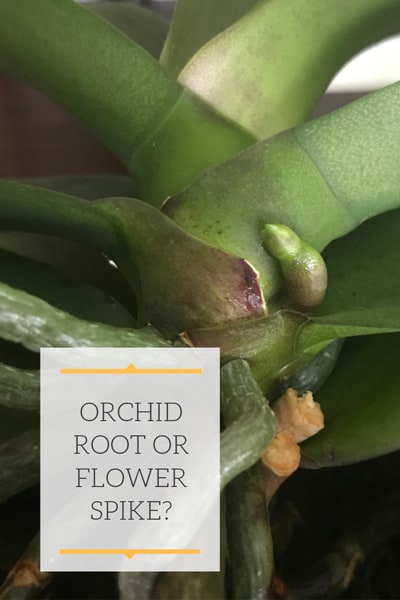
After my moth orchid collection expanded and I was successful in getting them to rebloom regularly, it became very easy to tell when a new flower spike was growing.
Keep reading, and you will be able to tell shortly too. And if you only have one plant and you have been successful in keeping it alive, go buy a few more to give yourself more practice!
Orchid Flower Spike or Root?
When a new root or flower spike starts to grow at the base of the Phalaenopsis, look carefully. There is a distinct difference between the two. Take a look at the picture below.
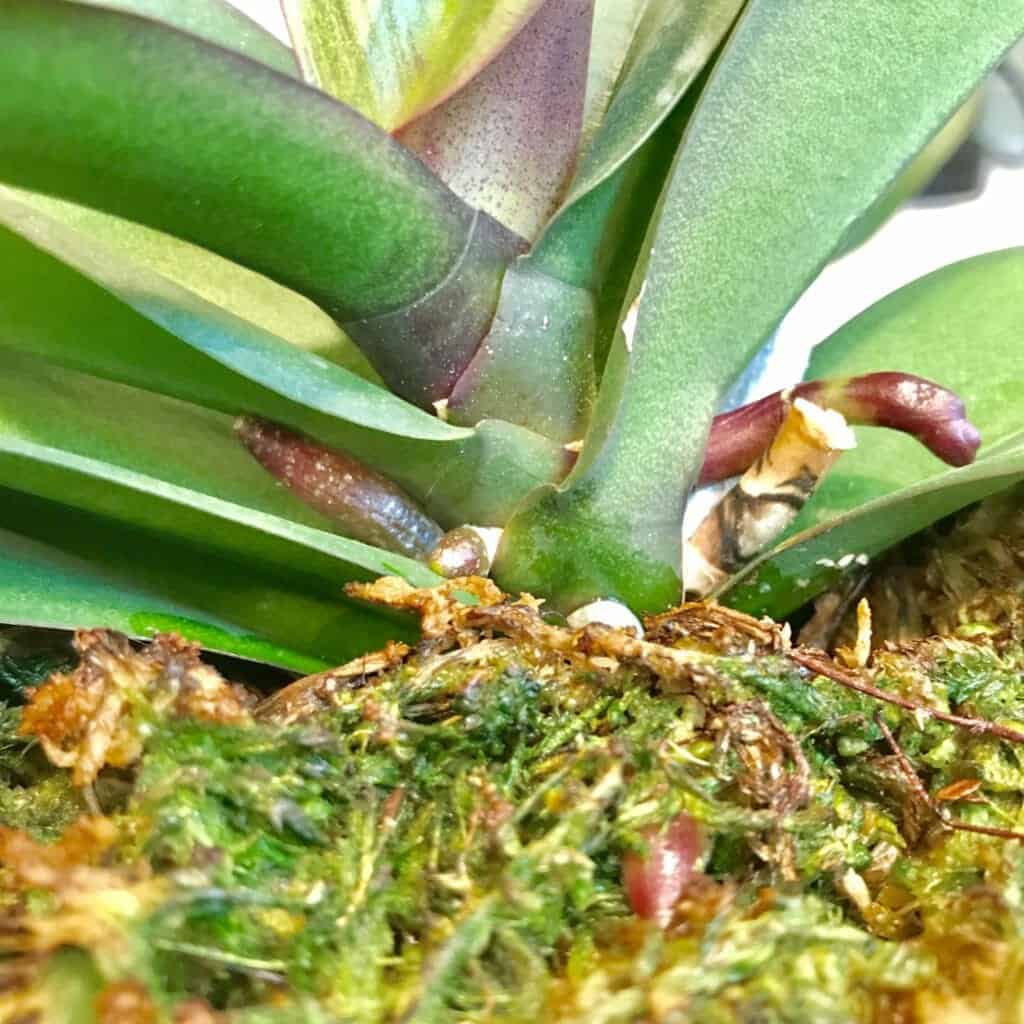
The short reddish growth on the left of the base of the plant is a root, and the growth on the right is a flower spike. You can see that the root on the left is rounder and it has a uniform tip.
On some Phalaenopsis orchids, it will be light green in color, but in this particular plant, it’s reddish. This just has to do with the pigmentation in your individual plant.
Now take a look at the flower spike on the right in the photo above. Again, this is reddish in color, and often times (not always) it’s an indication of the color of the flowers. Many times, reddish flower spikes and reddish tips on the growing roots can be an indication that your orchid has pink or purple flowers.
And often times, Phalaenopsis with white or yellow flowers typically will have greenish flower spikes and green root tips. This isn’t always the case, but it’s an interesting thing to keep in mind.
Here is an another example of an orchid flower spike just to show you another one that looks more green in color. The characteristic shape is still there though!
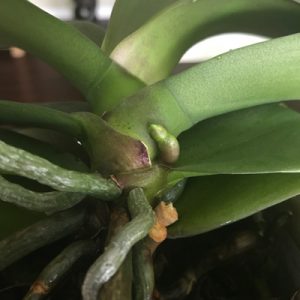
In both cases, you’ll see that most of the length of the flower spike is pretty uniform until it gets close to the tip. Then you’ll see the tip almost looks like the shape of a mitten.
This “mitten” in the picture above is a bit rounder in shape. Most of the time, they’ll look a little pointier. But the tips will generally be in the shape of a mitten.
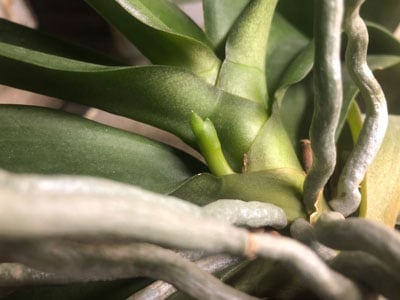
Here is another example of a flower spike that looks a little pointer and like a characteristic mitten shape:
As Your Orchid Flower Spike Grows
One very important thing to remember is that once your flower spike starts growing, you don’t want to rotate the pot at your window.
Normally, you’ll want to rotate houseplants every so often to encourage even growth and so that one side of the plant doesn’t lean excessively towards the window.
You DON’T want to do this when you notice a flower spike starting to grow. The flower spike will want to grow towards the window.
If you keep turning your plant, the flower spike will keep bending towards the window and it won’t have a very attractive shape. (But if you’re OK with that, go for it!)
Another thing you’ll want to do as the flower spike starts growing is to insert a bamboo stake into the pot so that you can start clipping the flower spike to the stake as it grows. It’s not absolutely necessary, but sometimes it helps if your flower spike is growing into your window.
You can buy special plastic orchid clips made specifically for this purpose. And these clips are not limited to using just for orchids. You can use them for other plants as well.

Take a look at the picture above. You can see the flower spike on two orchids clipped to the bamboo stakes with plastic orchid clips. Don’t be tempted to clip the flower spike to a bamboo stake too early.
Wait until the flower spike it at least a few inches long. Otherwise you may risk snapping the flower spike off. I did that once and I was furious with myself! Be very gentle and don’t force things too much. As the flower spike grows longer, it’ll be easier.

Normally, as the flower spike grows, I’ll either take a second clip, or just move the original one higher up to support the flower spike. And don’t forget, don’t rotate the pot at the window as the flower spike is growing!
I’ve also experimented with not staking the flower stalks and letting them just arch gracefully. It adds quite a bit of charm! If you have the appropriate space to do that, why not try both methods and see which you like best.
If you want to learn all about how to get your orchid to rebloom reliably and have healthy, thriving moth orchid plants, don’t miss my signature, online orchid care course, Become an Orchid Master. It also includes bonuses with support from me, personally, to guide you in your orchid journey!
Fertilizing Your Orchid
Are you struggling with not being able to get your orchid to bloom at all? You’ll have to make sure that you read my blog post on why your moth orchid won’t rebloom. Usually it has to do with not enough light…but read my article for all the important details.
I did want to mention one last thing that is very important for moth orchid care, and that is fertilization.
The most important things in getting your orchid to bloom is proper light. Cooler nighttime temperatures in the Fall will also help to encourage a flower spike.
But if you use a good fertilizing routine, you will enhance the size and number of your moth orchid flower, and who wouldn’t want that?
I used to use Dyna-Gro Grow and Dyna-Gro Bloom which I purchase on Amazon.
The link above will give you both the Grow and Bloom versions. I would use Grow during the active growing season when plants are putting out new leaves.
Switch to Bloom right right before anticipating flowering to occur, or you can even start as soon as you see a flower spike forming, which you should know what it looks like by now! 🙂
Dyna-Gro Grow and Dyna-Gro Bloom are amazing fertilizers for orchids and really any other houseplants. They are premium fertilizers, are urea-free and contain all the micro and macro nutrients that are essential for plant growth.
I’ve achieved amazing results using these fertilizers, so be sure to get Dyna-Gro Grow and Dyna-Gro Bloom today and see for yourself! Don’t settle for the inexpensive, poor quality fertilizers. Your plants are worth more!
If you don’t want to switch back and forth (it’s certainly not necessary, you can simplify your fertilizer routine like I have recently.) Check out my article on fertilizing Phalaenopsis orchids. It goes into matching up your fertilizer with the kind of water that you use.
Do you have any new flower spikes on your orchids?

Kathi
Friday 21st of April 2023
The last thing my mother said to me was I love you take care of my orchids her last dying words. Well it put out beautiful blooms hanging from my pine tree indirect light .I have grown plants desert roses plume rise never an orchid. In the meantime I moved to Daytona beach 25 miles south. Now my orchids is very ill I pulled out one stalk no roots. Why can I root one it and lay it down in the moss? How do I root it? Its not like my other plants I'm sure the other stalks are the same I did report before I moved in bark sat should I do?
Raffaele
Friday 21st of April 2023
Hi Kathi! I'm so sorry to hear about your mother. I'm happy to help if you can email me more details and send me some photos. Please use the contact form on my website, and when I reply, you can attach some photos and I can try and help you.
Joanne
Saturday 24th of September 2022
Thank you for great descriptive details between a root and flower spike. The "mitten shape" was very helpful. I recently rescued/purchased orchid plants that were on sale, now with your information hopefully they will start to grow flower spikes.
Raffaele
Monday 3rd of October 2022
Glad to hear Joanne! Good luck!
Donna
Tuesday 9th of August 2022
What about the roots that shoot all over? Just leave them or?
Raffaele
Wednesday 10th of August 2022
You can mist those frequently so they stay nice and plump. When it's time to repot, you can gently place those in bark or sphagnum moss...whatever you are growing your plant in.
Jane Wismer
Sunday 13th of March 2022
The new root tips are about 2” long and now have a brown tip. What do you recommend?
Raffaele
Sunday 13th of March 2022
Hi Jane! It would be helpful to see photos so I can help. I'll send you an email and you can attach them.
Crystal Beeson
Monday 15th of November 2021
I must be doing something right. 5 Flower Spikes!
Raffaele
Monday 15th of November 2021
Wow! That's amazing! I bet it will be quite a show when it's in bloom!