Some of the links in this post may be affiliate links.
Have you wondered exactly what to do with Amaryllis bulbs after they are done blooming? Confused about how to properly care for amaryllis? Well keep reading because I have grown amaryllis plants to mammoth proportions in the past, and they have produced clusters of bulbs and several flowering stalks all in one pot!
I will teach you everything I know so that you can easily do this too if you follow my tips and instructions.
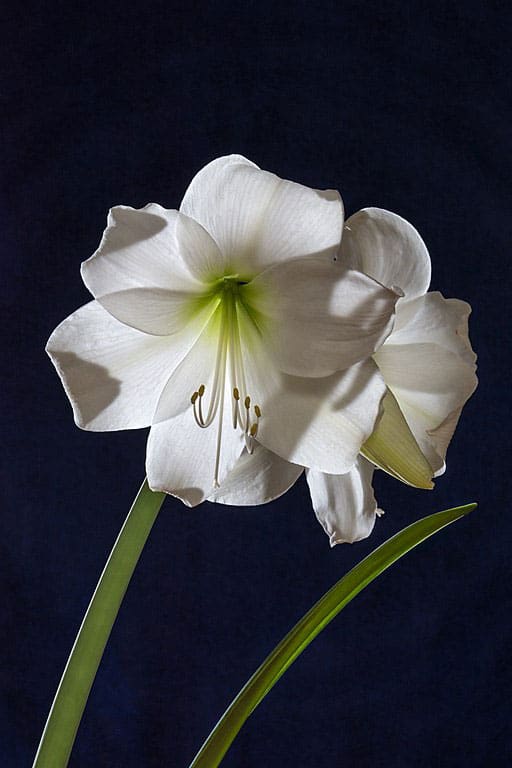
There are many things that are crucial to have your amaryllis bloom and thrive for years to come:
- Proper light
- Correct dormant period
- Attention to the foliage
- Fertilization to help keep the bulbs strong for the future
Table of Contents
Planting Your Amaryllis
Quick side note…Amaryllis is just the common name for this plant. Not to be confused with the “belladonna” lily which is Amaryllis belladonna.
What most people know as Amaryllis are actually in the Hippeastrum genus. Common names can be so confusing!
I will refer to these plants as Amaryllis though because that’s what everyone calls them.
When you first get your amaryllis bulb, it is important that you plant the bulb at the correct depth. More on this topic shortly.
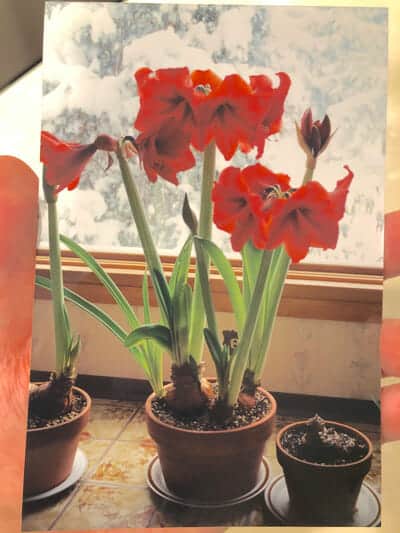
Check out this amaryllis below that I grew years ago. Look at all the blooms! It grew into a cluster of bulbs, and each bulb produced multiple flower stalks, each with 4-6 flowers.
I had this plant for over a decade before I bought my own home and left my parents’ house and sadly didn’t take it with me…what a mistake that was!
Purchasing an Amaryllis Bulb
I would recommend purchasing the biggest bulb that you can afford.
If you see skimpy little tiny bulbs, they honestly are not worth even the few dollars that you spend on them, unless you want to force them to bloom and throw away right after.
For best results, avoid purchasing the pre-boxed kits where you can’t see the bulb.
I like to either go to a garden center and hand select big, loose bulbs, or you can purchase some online. Regardless, only get the biggest one that you can afford. I promise you won’t regret it.
These plants can become glorious specimens, as you can see from my photo above of the ‘Orange King’ amaryllis that I cared for over a dozen years or so.
Planting Your Amaryllis Bulb
Select a Pot
Next, select an appropriate pot size for your amaryllis. You don’t want to pick too small of a pot, but you also don’t want a gigantic pot.
Place the bulb in the middle of the pot that you think you’ll use, and you’ll want about 2-3 inches, roughly, from the edge of the bulb to the perimeter of the pot.
I prefer either terracotta pots or ceramic pots. They give you extra weight because these plants can become too top heavy if you plant them in lightweight pots.
My preferred pots of choice are terracotta pots. Although you will be watering more frequently due to the porous nature of the pots, it will result in a healthier root system.
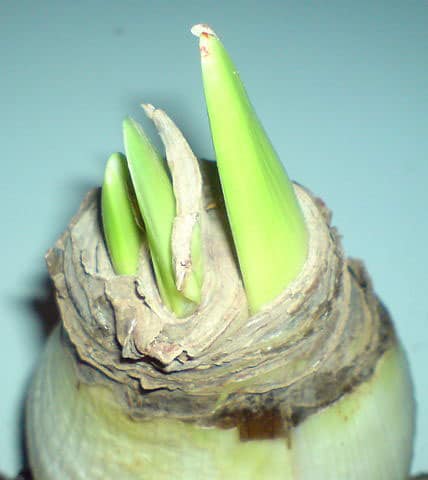
Planting the Bulb
Regardless what pot you choose, it MUST have a drainage hole. Don’t even think of planting in a pot with no drainage hole.
The potted bulb should be about half exposed and half under the potting soil.
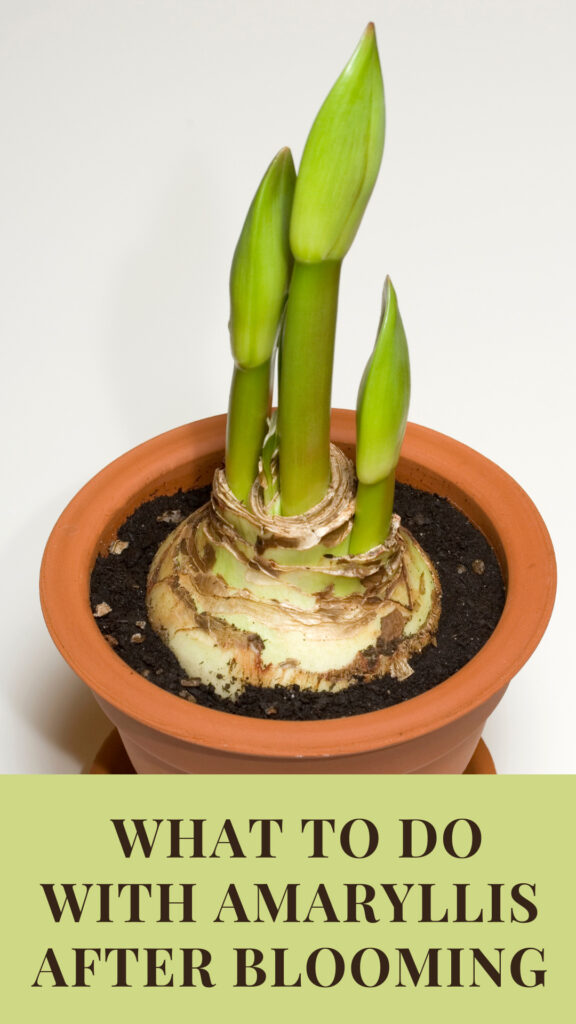
I like to place a broken pot shard over the drainage hole, and use a general all-purpose potting soil (I really love Espoma’s potting soil or use any good, well-drained indoor potting mix) to which I mix a good bulb food. You can even add in 1 part perlite or 1/4″ pumice (link to Amazon) into 3 parts of your favorite potting mix to improve drainage.
I have gotten fantastic results with using Bulb-Tone and mixing it right into the soil.
Stick with this fertilizer and you will not be disappointed. You should not use any fertilizers that are high in Nitrogen for bulbs.
A very important step in planting the bulb is to make sure you don’t bury the whole bulb under the soil. Keep about the top half above the surface of the soil.
Lastly, be sure to gently firm the fresh potting soil down with your hands.
Place Your Amaryllis in its Growing Location
Once you have planted it, give it a light watering and place it in a bright location. These plants prefer a lot of direct sun, and you have read many sites that say to place in bright indirect light.
This is not the case and I have achieved my results in part because I kept my plant in a very sunny Southern exposure window.
These are sun loving plants! So place your plant in the sunniest spot that you have. More on this topic later.
For more detailed information on planting a bulb, check out my detailed post on how to plant an amaryllis bulb.
Caring for Amaryllis during Flowering
Now it’s a waiting game! Be careful not to overwater your amaryllis at this stage because it won’t be able to use much water yet. Wait until the top couple inches of potting soil are dry before watering again.
Within a few days to a couple weeks or so, you should be able to see some new growth with the flower stalk(s) emerging from the top of the bulb.
Sometimes when you purchase your bulb, the flower stalk has already started in growth.
Turn Your Pot
As your amaryllis flower stalk(s) start to grow, you’ll need to rotate your pot so that the stalk(s) grow straight. They will continually lean toward the light, so rotate them every few days, or as needed.
For a healthy, well-grown plant, each bulb will produce at least one flower stalk, and each stalk should have at least 4 flower buds.
In my plant that I described earlier, I had several flower stalks in one pot and each stalk had 4-6 flowers!
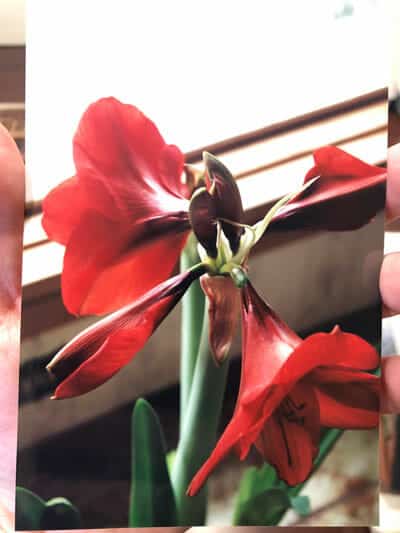
This is a photo of the same plant where you can see the stalk has 6 flowers.
What to Do With Amaryllis After Flowering
This is the trick, right? What exactly should you do with your amaryllis after it is done blooming? The key is to understand the growth cycle.
Cut the Flower Stalks Off
After the plant has bloomed its heart out for you, carefully cut the flower stalks off as close to the bulb as you can. Be careful not to cut into any leaves. You can also wait until the flower stalk dries up on its own before cutting it off. Either option is fine.
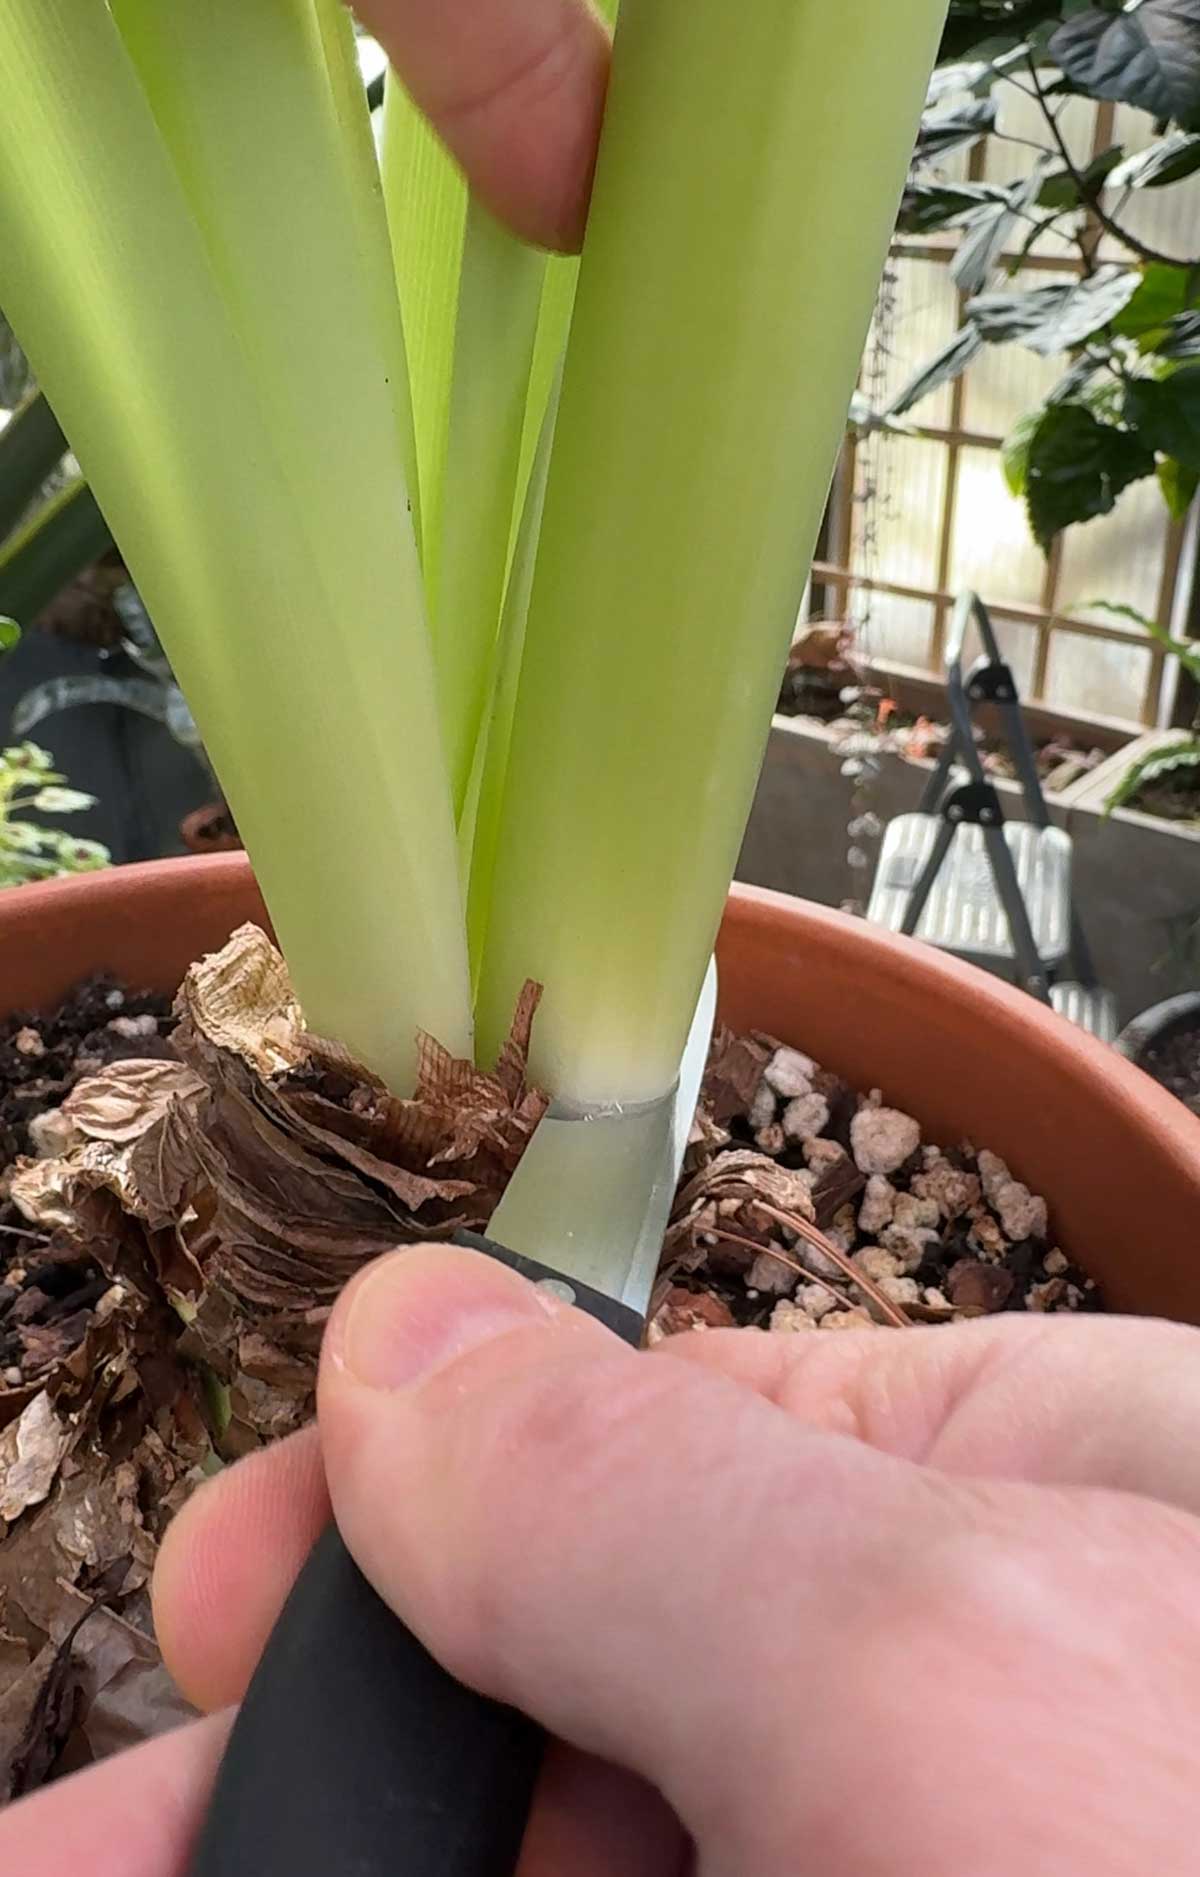
This is the crucial time for your amaryllis where you will be nurturing it until it reblooms again for you the following year.
And if you follow my advice, it will be very easy to keep your amaryllis blooming every year for years to come! I have repeated this process for many, many years and it works.
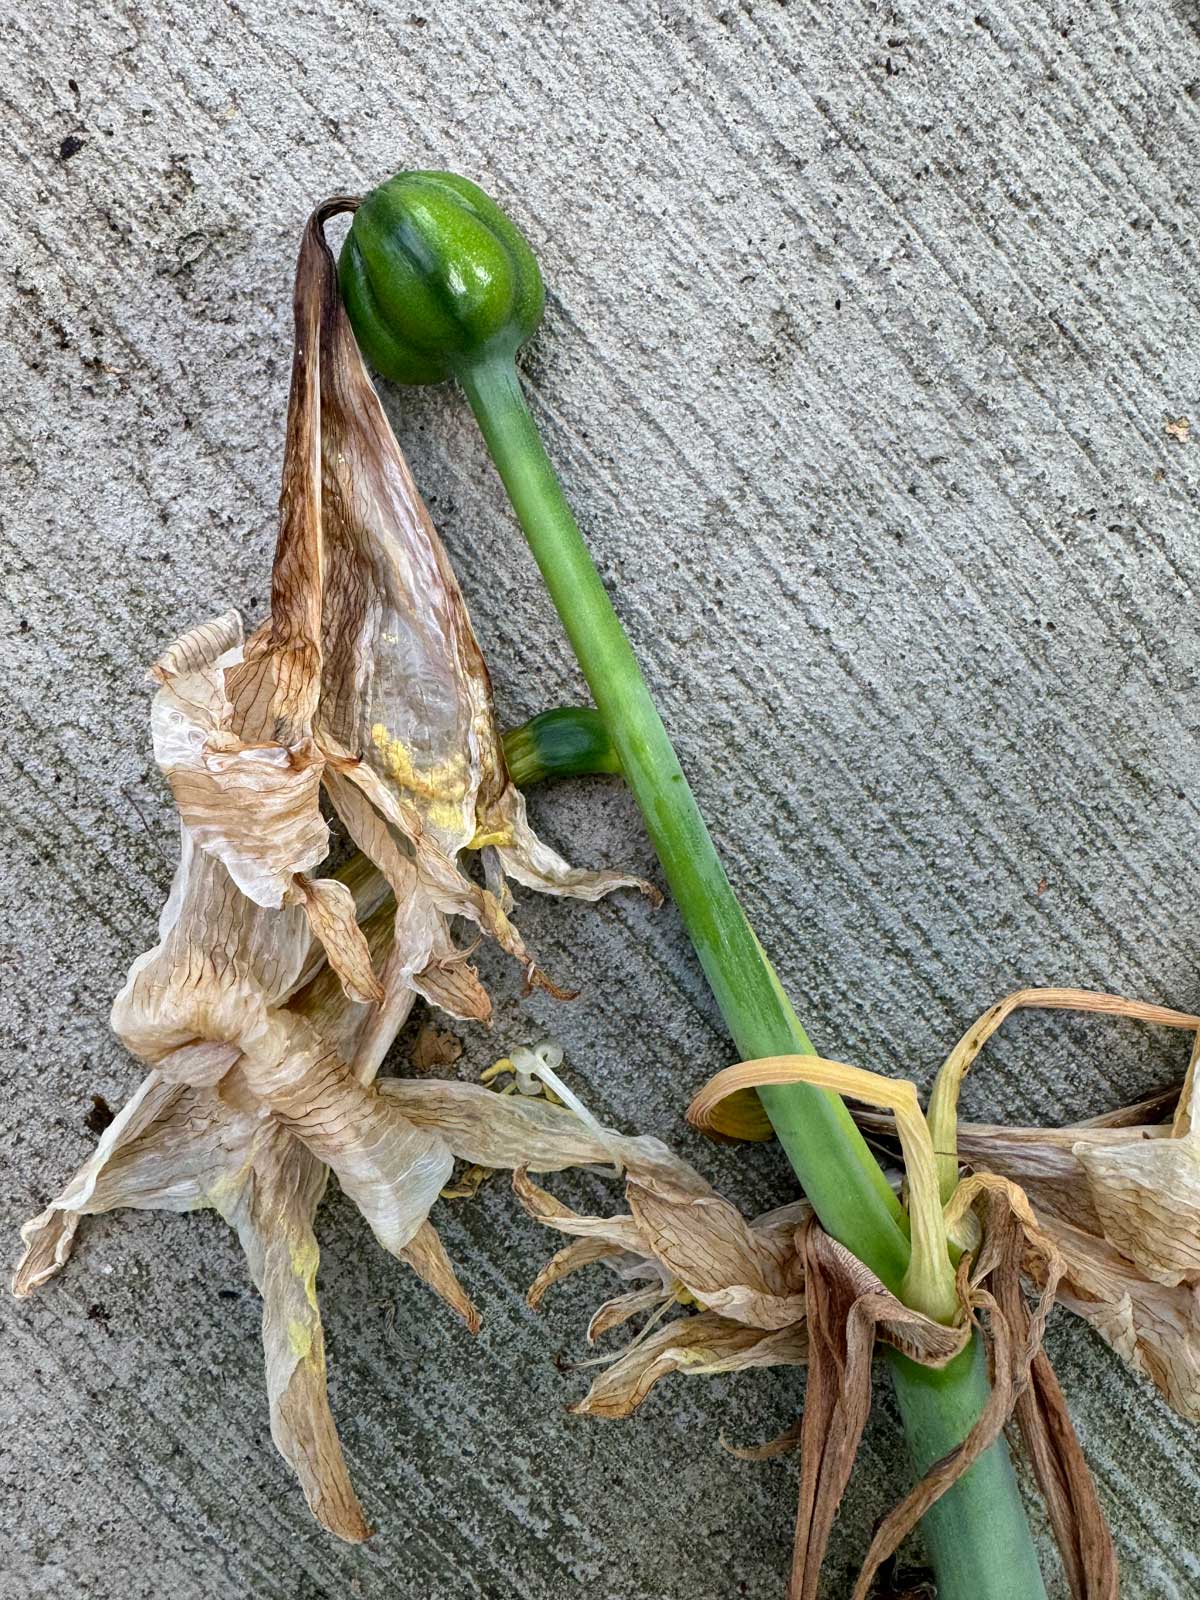
Sometimes, the flowers will pollinate and you will get a bulbous growth at the top of the flower stalk, like I show in the photo above. This is a seed pod.
You can leave the seed pod on the stalk until it turns dry and brown, and then harvest the seeds inside and plant them. Keep in mind that if you grow amaryllis from seeds, the resulting seedlings may produce flowers that are not like the parent plant, but it is fun to find out!
If you don’t plan on sowing seeds, cut off the seed pods so the plant doesn’t waste energy producing seed.
HOW TO CARE FOR AMARYLLIS PLANTS
Allow the Leaves to Grow and Provide Routine Care
After you cut off the spent flowers and flower stalks, this will be the growing phase for your plant. Do NOT cut off any leaves at this time. You need to allow them to grow and ripen for several months until the next dormancy period.
Sometimes amaryllis will grow leaves at the same time as the flower stalks, and sometimes they will appear a bit later. After all, plants are all individuals like people!
Light
Keep your growing amaryllis in the sunniest window you have. If you don’t, you will risk not getting any flowers, or a poor show at best.
The plant I documented in this post was kept in a large, Southern exposure window that was very sunny.
If you keep your amaryllis is lower light, you can tell because the leaves will become weak and floppy. Amaryllis need to be in direct sun for best results.
When temperatures are warm enough, I like to put my plants outside (see details below in a separate section).
Watering
Allow the surface of the soil to dry out, maybe an inch or so. Then water thoroughly. Do not let your plant sit in water at any time or it will rot.
Fertilizing
You want to avoid fertilizers that are high in nitrogen. Bulbs like to have have fertilizers that lean more heavily on the Phosphorus and Potassium.
I’ve had really great success with using both Bulb-Tone and Neptune’s Harvest Fish Emulsion. Always use fertilizers as recommended according to the label. I only use fish emulsion if I have my plants outdoors because the odor is quite strong.
Stick with these fertilizers, and I will summarize those again at the end of the post for your convenience. I highly recommend these fertilizers to enhance the size and quantity of your blooms!
When Warm Weather Arrives Outside
If you live in a cold climate like me, when the weather is warm enough to place houseplants outside, the best thing you can do is to place this plant outside in full sun.
Don’t put it directly into full sun immediately though! When transitioning a plant from indoors to outdoors, you need your plant to go through a hardening off period.
This is CRITICAL otherwise you will scorch the leaves very quickly.
Although your plant may have been growing in full sun indoors, you still need to harden off your plant when you move it outdoors.
When the weather is warm enough, start out by placing the amaryllis in full shade for a few days. It will get accustomed to the higher light outdoors.
Then move it to an area where it maybe gets an hour or two of morning sun. Do this for a few days. And gradually increase it from there.
You can’t go too slow with this process, but if you go too fast you will burn the leaves!
Preparing Your Amaryllis to Rebloom
Stop All Watering
This is the secret sauce right here! Leave your amaryllis outside until about late September or early October.
At that point, place it in a sheltered spot outside where it would get NO rain and you want to completely cut off all water.
If it is too cold outside, depending on where you live, bring the plant back indoors. As long as the minimum temperature outside is around 55F or so, you should be just fine.
Again, cut off ALL water. The foliage will start to yellow and wilt. In the photo below, I’ve withheld water for about 2 weeks, and you can see the plants are starting to go dormant.
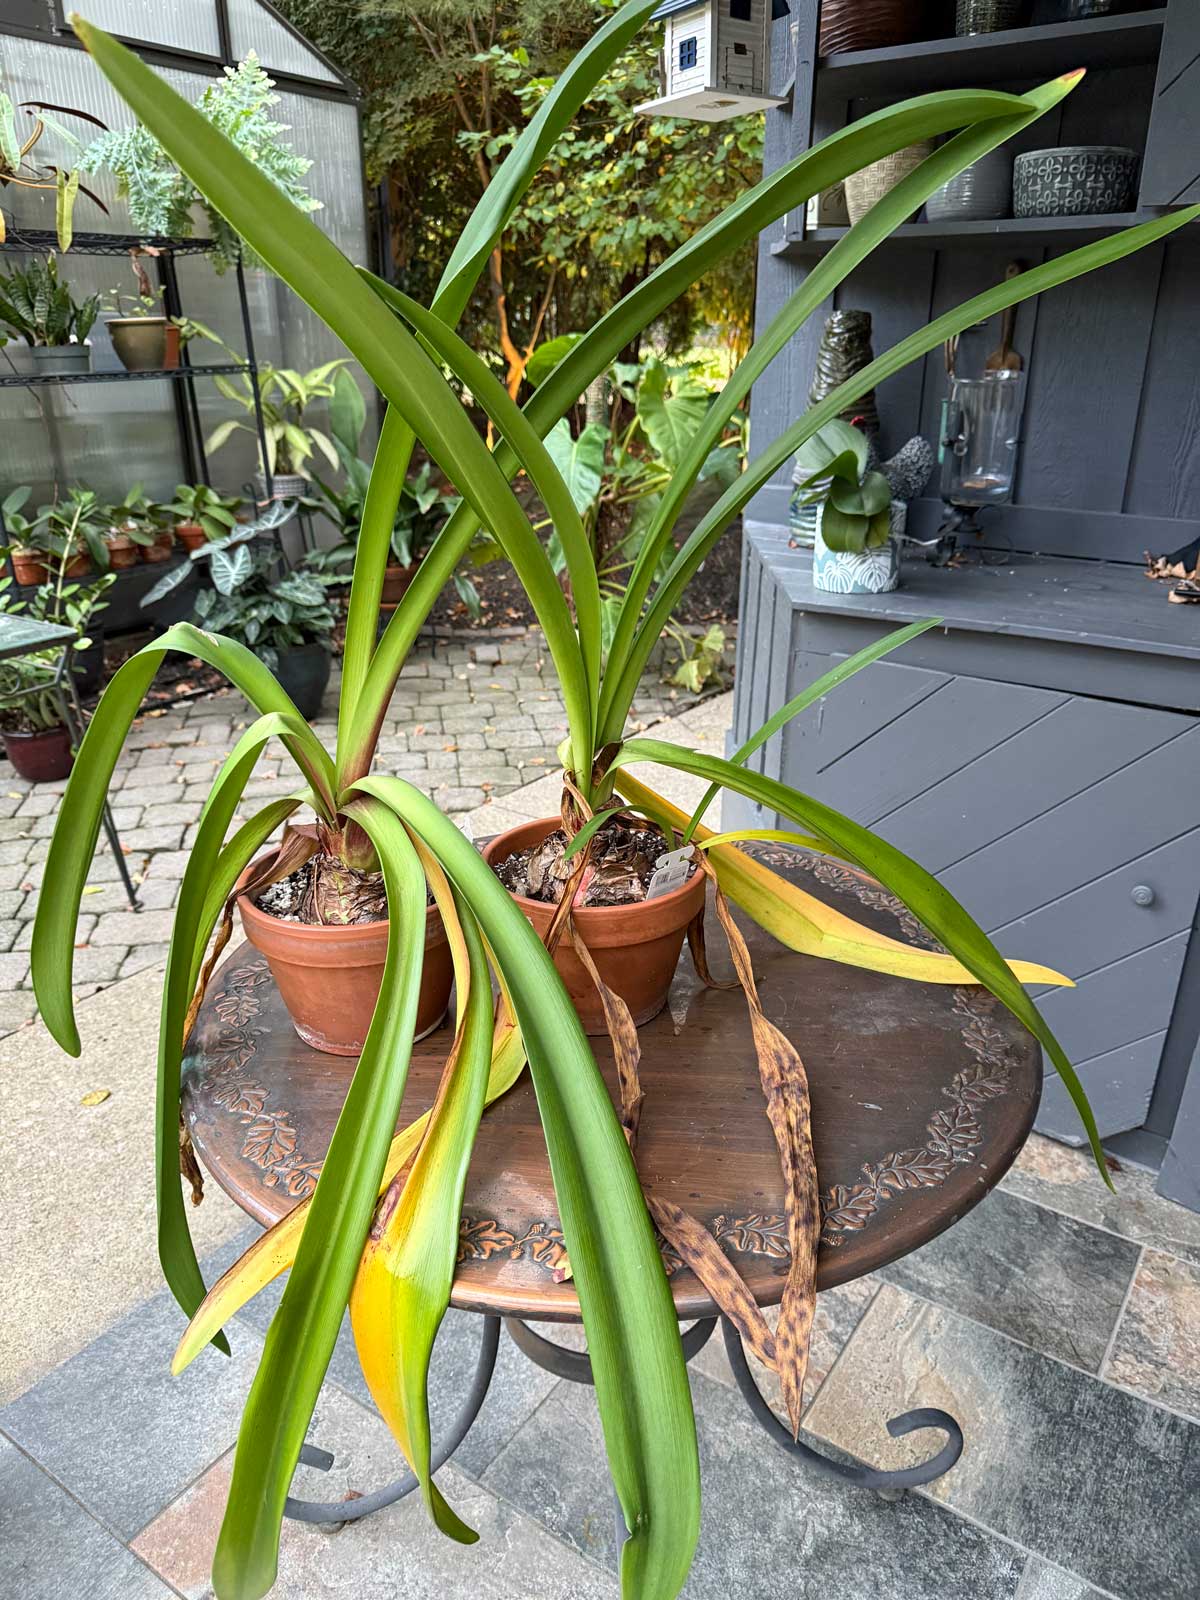
When all the foliage is yellowed and dried up, take a sharp, sterilized knife or scissors and cut all the leaves off down to the neck of the bulb. The foliage won’t all do this at once so you can remove any brown leaves as they happen.
Let all of the foliage ripen and don’t cut any foliage off until this is done!
Dormancy Period
Next, you’ll want a period of dormancy for your plant.
Then place the pot in a cool, dark place for a full 4-6 weeks. A cool place like a basement works well. You’ll want your bulb to rest for at least a month.
If you want to delay forcing the amaryllis to bloom a little later, you can keep it a couple more weeks.
One thing to note is that most amaryllis that are on the market need this dormancy period.
This is one variety that is evergreen and that you should NOT give it a dormancy period. The variety is Hippeastrum papilio (or the butterfly amaryllis).
Return Your Amaryllis to Your Window
After the 4-6 week rest period for your amaryllis, it is time to return your amaryllis to your sunny window.
At this time, it is also important to replenish the nutrients in the soil. I like to add a special bulb fertilizer blend to the soil, and also use liquid fertilizer throughout the whole growing season.
I have achieved wonderful results with using Bulb-Tone for my amaryllis throughout the years. Again, for bulbs, you don’t want to use any fertilizer that has a high nitrogen content. Bulb-Tone has been absolutely fantastic.
Simply use the recommended amount per the label, and mix it into the top part of the soil, and water it in.
Give your plant a nice watering at this time, but go easy on the watering until the growth really starts to take off. After the plant is done flowering, I like to fertilize periodically with a fish emulsion fertilizer.
Using the Bulb-Tone and fish emulsion fertilizers (both organic and not synthetic), it really results in beautifully healthy plants that flower abundantly!
You should soon get flower spikes forming, and then new leaves. The flower spike typically comes first, but not always.
Take note when your amaryllis blooms. If you want to tweak the bloom period for the next year, you can adjust the timing of when you take the bulb out of dormancy in the following year so that you can have it bloom during the holiday period.
Amaryllis Toxicity
Amaryllis is toxic to cats and dogs according to the ASPCA.
CAN I PLANT A WAXED AMARYLLIS?
Lastly, I wanted to address the trend of waxed Amaryllis bulbs. Waxed Amaryllis were developed in Europe and have now become very widespread. The bulbs are encased in wax to conserve moisture.
You simply purchase the waxed bulb, place it anywhere in your home (preferably right in front of a window) and it will bloom in a few weeks. No soil, no pot, no water. Simply place it down!
If you want to just enjoy the blooms and throw it away, this is a great option for you.
However, if you want to keep the plant long-term, resulting in a beautiful specimen like I’ve shown earlier in this post, buy an unwaxed bulb and follow my instructions earlier in this post.
If the waxed bulb was a gift, or if you didn’t know, and you want to keep growing it year to year, I’d recommend the following (and check out my blog post on saving a waxed amaryllis bulb for a guide with photos). The basic steps though are:
- Try and remove the wax off the bulb as soon as possible. If you wait too long, you’ll decrease the chances of success.
- At the base of the bulb, there will be a coil of wire which is meant to keep the plant from tipping over. Remove the wire.
- Depending on how long the bulb has been in wax, you may find that the outer part of the bulb may be moldy or mushy. Gently clean away this areas to expose the firmer bulb underneath.
- I would then let the bulb sit to air dry for about 2-3 days.
- Finally, go ahead and plant it in a pot like I described earlier in this post. You may want to refrain from watering for a few days after you plant the bulb.
- Place in a sunny window and hope for the best!
Like I mentioned, these waxed bulbs are NOT designed to be kept long-term, but if you remove the wax early on, you may be able to save it and keep it growing year over year.
If you intend to keep it long-term, it is wise to just purchase an unwaxed bulb if at all possible.
COMMONLY ASKED AMARYLLIS QUESTIONS
Should I cut off dead amaryllis flowers?
Yes, after all blooms have wilted, cut off any flower stems as close to the base as you can with a sterilized, sharp knife. Do NOT cut off any leaves. Place your plant in a sunny spot and allow the leaves to keep growing for several months until the dormancy period the following year.
Why amaryllis will not bloom?
The most common reason in most cases is not enough light. These plants need to be in a sunny location in order for the plant to be strong enough to bloom for the holiday season.
What do you do with amaryllis bulbs after they bloom?
The most critical part is that you MUST keep the leaves growing and in a sunny spot. Simply remove any spent flowers, as well as the flower stalk, and allow the leaves to keep growing until you induce a dormancy period right before the holiday seasons. With proper care, your amaryllis will bloom for years to come.
So this concludes the blog post on how to care for amaryllisf and how to get amaryllis to bloom for you year after year. With a little effort, you will end up with a beautiful specimen plant! And if you love flowering plants indoors, check out my blog post on the best flowering plants to grow indoors.


Margaret Kimball
Monday 19th of January 2026
I'm so glad I found this article! My young granddaughter sent me a bulb for Christmas this year. I planted it according to the directions on the box and one stalk with the flower is getting ready to open soon and one stalk with is still growing. I am going to keep the bulb according to your instructions for blooming next year! Thank you again!
Raffaele Di Lallo
Monday 19th of January 2026
You're very welcome Margaret!
Peggy Baruch
Saturday 17th of January 2026
What do I do with the amaryllis plant if it did not produce blooms?
Raffaele Di Lallo
Sunday 18th of January 2026
I would recommend following everything I have in this post, and you may get blooms next year. It's not just one thing. If yours didn't bloom, it didn't get the care that it needed to be strong enough to bloom. High light is extremely important, as is a good fertilization schedule, but attention to watering, etc is all important.
Karenne
Friday 9th of January 2026
What if I accidentally cut off the leaves? Do I lose a year of potential blooms?
Raffaele Di Lallo
Sunday 11th of January 2026
Probably. But it wouldn't kill your plant. If you follow the rest of the care in the post, you can bring it back and it will probably bloom the following year though :-)
Richard
Tuesday 6th of January 2026
I bought a bulb this fall and it came in a pot with no drainage. It bloomed quite well but I want to repot at some point. At what stage should I repot?
Raffaele Di Lallo
Wednesday 7th of January 2026
If it's done blooming, I would repot it now.
Melinda
Friday 14th of November 2025
I live in Vancouver BC, Canada My amaryllis has been in a dark area for at least 6 weeks. Can I bring it out now?
Raffaele Di Lallo
Sunday 16th of November 2025
Yes it should be fine by now. :-)